Thursday 16 January 2020

Minor - Reflective Statement

The minor project really was a challenge for me. Maya has always scared me a bit, and I think this is the first project I've had where I've fully thrown myself into it. I ran into a lot of difficulties due to my lack of experience, especially in the rigging process of the project. I'm disappointed that I couldn't finish everything that I wanted to get done. I made a lot of mistakes and had to redo my orthographs, models, skeletons, and skinning so many times which cost me a lot of time. despite all this, I'm extremely proud of myself and what I have managed to achieve. I didn't get everything done on my list, but I wholeheartedly tried my best. I also learned so much from the mistakes I made. 

I'm glad that I had my premise project to work from. I found it very easy to continue the project and knew exactly what I was working towards. My only worry was how I was actually going to make my film possible. It's quite easy to turn a 2D drawing into a 3D model, but to turn a 3D model into a 2D character has proved to be quite a challenge. I was able to experiment much more with techniques during the Minor Project than I did in the Premise Project. I still need to experiment with the VFX I'm going to use in my film, but I'm feeling much more confident about how to do this. 

Chromakey Test

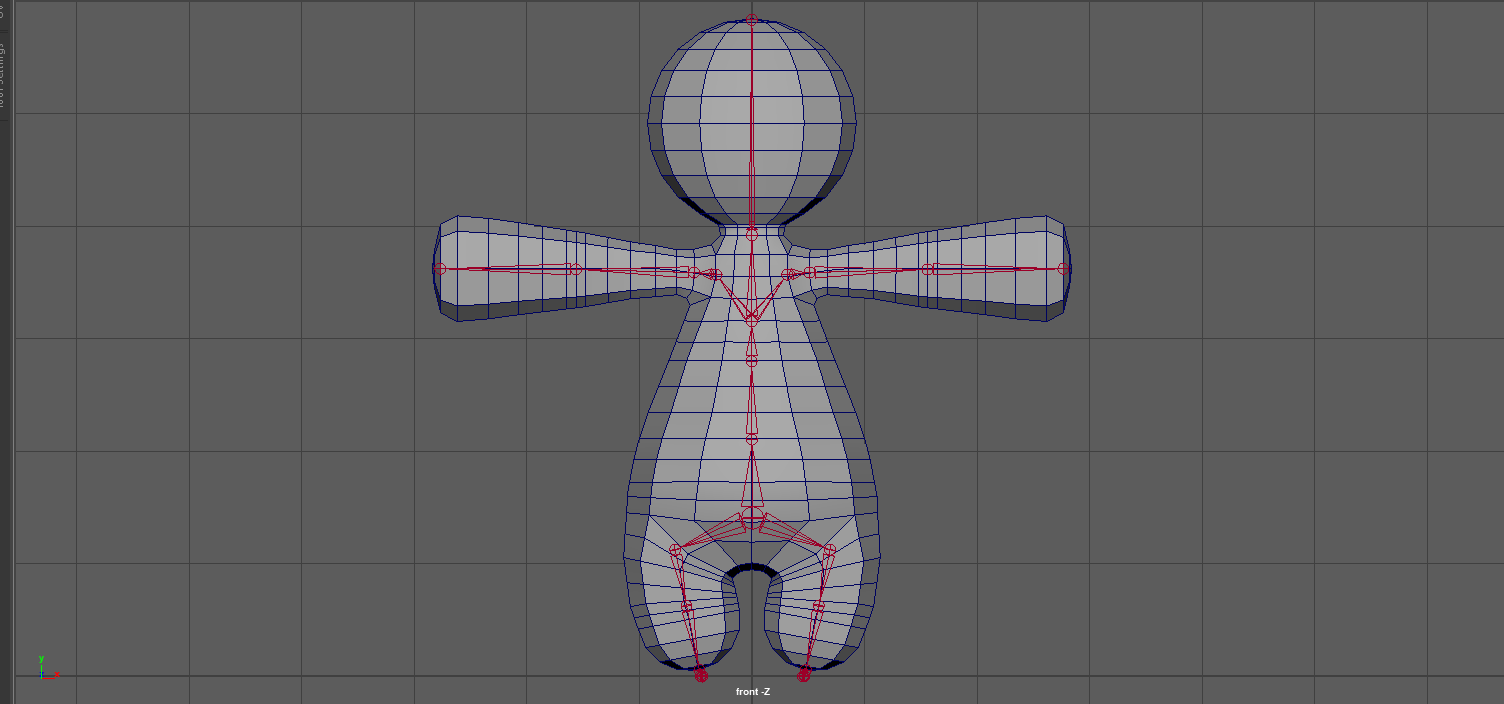
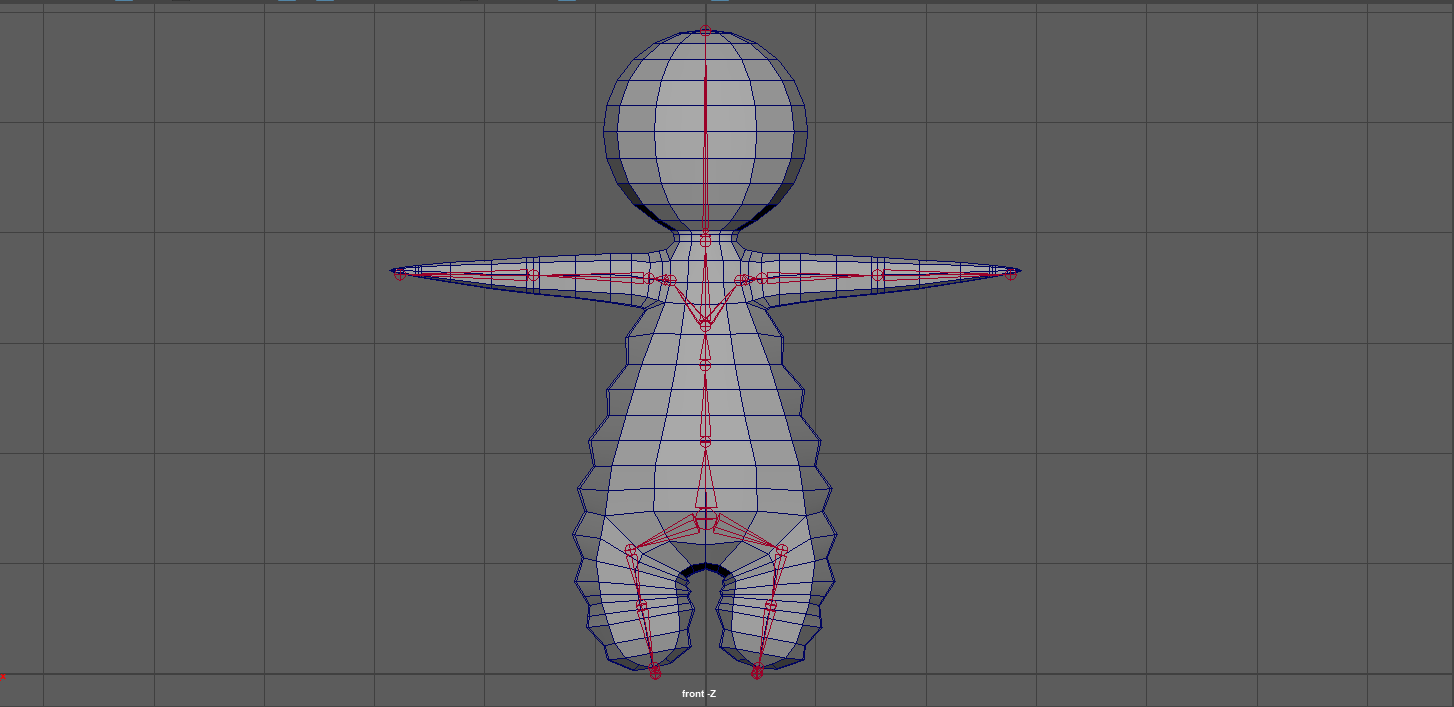
At first, I didn't struggle much with modelling my characters. I made a few changes and ran into a few errors due to switching between different versions of Maya, but it was only until I started skinning that I realized that there were more problems with the geometry of some of my characters than I'd thought and had to go back to the modeling stage and make changes. I also had to redo the skeletons of my characters. At first, I tried to give my characters ribbon spines. But I was struggling a lot during the skinning process. I ended up having to take the ribbon spine out and create a simpler skeleton. This made skinning and rigging a lot easier for me, but this happened just a couple days before the deadline, so It was very hard for me to try and catch up to get my characters rigged. I managed to get 3/5 characters rigged despite this setback.


Page from 'Drawing The Line' Making of Document

There are so many things that I can improve on for my Major Project. I'd like to redesign my Making of Document and create a more professional demo reel of my characters. I'd also like to refine the Toon Shader effect more and improve my rigging and project management. Compared to my previous projects, this is the most organized I've ever been, and I will try hard to get even better as I still have a long way to go to work at a professional standard. I still find myself making beginner mistakes like working over different versions of Maya and then wondering why I'm having problems. Leaving things that are important, like sound design, to the last minute (which ended up not getting done as I ran out of time) and making frustrating mistakes. However, I'm feeling positive about how 'Drawing The Line' is going to progress. I now have a name for my project that I'm happy with. I know what direction my film is going in, and I now know what I need to do to achieve what I want. I feel truly invested in this film now, and I'm excited to actually make it! 

Monday 13 January 2020

Minor Project Submission


'Draw The Line' is a story about identity, conformity, and acceptance. This story is personal to me and is my way of expressing my journey and relationship with my gender identity in a light-hearted, comedic way. I hope that other people will watch my animation and relate to Sketch, and feel reassured that you don't need to change yourself to please anyone and it's okay to stand up for yourself and be who you want to be.

My main goal for the Minor Project was to tackle the concept of turning a 2D character into a 3D model, but still, look 2D. I had to experiment to see which method suited the aesthetic I wanted the most. My animation will have quite a lot of FX, so I really wanted to try and figure out a way to make Sketch work. I also wanted to be as prepared for the Major project as I could, So I aimed to tie up all of my concept art and really focus on the 3D Pipeline as much as I could for the Minor Project.

The agreed outcome of the project was:

- Final character and prop designs. 
- Experiments with Toon Shader and VFX
- Revised animatic with sound
- All characters modelled, textured, skinned and basic rigging.
- Showreel of characters.


Friday 10 January 2020

Minor - Sketch's New Skeletons

I've had to heavily edit the skeletons I have made for Sketch and all the different versions of them. The reason being is that they were not correct. Some of the joints, especially the chest and clavicle joints were too high up. I've also taken out the ribbon spine as Alan suggested that it would be a lot easier for me to take them out and that my character didn't really need it. He also said that by taking out the ribbon spine and by placing the joints in the corrects places, the skinning process should be a lot easier than it already has been. I've had a lot of problems with skinning so Hopefully, I will be able to catch up with skinning and rigging these characters in time for the submission.


Original Sketch New Skeleton

 Feminine Sketch New Skeleton

 Squiggly Sketch New Skeleton 
 Masculine Sketch New Skeleton


Minor - Toon Shader Test #2

I've been having a hard time getting the textures to look okay on my Sketch models. I've tried a few different methods and never really liked the outcome. However, I'm pretty happy with this test. I changed the colour of the base of the aiToon shader to a bright green colour. I then created a large plane, placed it behind my character, and changed that to a green colour too. I made some simple animation of sketch moving across the screen so I could quickly test out this method. I rendered the sequence and put imported it into Adobe Premiere to chromakey the footage.


Frame from Render Sequence

I used a free to use image for the background that looks similar to the set of my animation. This was my first time using a green screen to edit but I found it surprisingly easy. I think this method could be great for my animation as I'll be able to have the toon shader outline, but would still be able to have a paper-like texture on the character that doesn't warp or move (Which it did when I experimented with adding a paper texture to the character.) I'll be able to test out this method properly when my characters are fully rigged and I can make some animation tests, although this is the only method I've used so far that I actually feel positive about.


Chromakey Test
The only issue I've been having with this method and with Sketch is that whenever I try to render an image sequence, Maya has either crashed or has caused my entire computer to shut down. I've had this problem whenever I've tried to render characters with the aiToon shader on it, no matter what kind of tests I was doing. I've looked into how to stop Maya from crashing and one method was to make sure that Autodetect Threads was turned off in the system tab of the render settings. This is the only thing that has gotten me to be able to render anything with a shader on it, however, my computer will still crash after about 30 frames have been rendered. This is a bit worrying as I need to figure out how to be able to actually render my character properly in order to use it.

Minor - Fem Sketch Blending the Wights for Feminine Sketch

I've blended the weights for the Feminine Sketch model. I'd like to try and get all of the weights blended for each of my models so just in case I can't fix my blendshapes, I'll still be able to somewhat pose my characters and I can focus on blend shapes and rigging in the Major Project.

Wednesday 8 January 2020

@Alan - Blendshape Problems

I've run into quite a few problems while I've been trying to add blendshapes to Sketch. Every time I try to add a blendshape, I end up somehow bringing parts of the pelvis into the blendshape and I'm not sure how I'm doing this or how I can fix it?  I also keep getting a warning that says "// Warning: Cycle on 'l_shoulder_blendShape1.inputTarget[0].inputTargetGroup[4].inputTargetItem[6000]' may not evaluate as expected.  (Use 'cycleCheck -e off' to disable this warning.)" I'm not sure why I'm getting this warning and it's a bit worrying as I don't want to spend time working on the blendshapes just for something to go wrong. I'm also not sure why the arm has dark shading on it which is also worrying me. I'm going to focus on skinning the rest of my characters as I have wasted a lot of time restarting the blendshapes and still haven't been able to find a solution to the problems.


Minor - Artist's Arms Texturing

I've textured the Artist's Arms using Substance Painter. I used Substance Painter so that I could Paint the textures directly onto the model, making the process a lot quicker and efficient rather than have to go back and forth between Maya and Photoshop. 


Substance Painter Workspace

I was able to export my work on Substance Painter as a UV map so I could easily apply the textures onto my model in Maya.


Both Arms Textured

I'm really happy with how the textures look at the moment. I haven't done any proper renders of them yet so this is just what they look like in Maya's viewport. I'll also be adding a different material to the nails so that I can control the specularity and make them look a little shiny. 


Left Arm Textured

Right Arm Textured

Minor - Binding and Weight Grouping for Sketch

I've finished binding and weight grouping on my normal Sketch model. I just need to work on the blend shapes and then sketch will be skinned. Sketch has taken me a lot longer to skin than the Artist's arms, as I've found it quite hard to work independently from tutorials, and have had to restart many times as I kept making mistakes. I'm a bit worried as I still have three more versions of Sketch to skin and rig but I'm going to try my best to get the basic rigging done for all the characters so I can get it out of the way and won't have to worry about basic rigging during my Major project.

Saturday 4 January 2020

Minor - Artist's Arm Complete Basic Rig

I've completed the basic rigging for the Artist's arms and tested out all the controls to make sure they're working properly. Now I need to focus on rigging Sketch and the different versions of them.


Friday 3 January 2020

Minor - Artist's Arm Basic Rigging Without Colours and Restrictions

I've finished the basic rigging for the Artist's arms, without Colours and restrictions. I'll be working on that next. After I've finished the Rigging on the artist's arms I'm going to focus on rigging Sketch as I would ideally like all of my characters rigged by the end of the Minor project.


Screen Cap of Basic Rig

Thursday 2 January 2020

Minor - Artist's Hand Rigging

I've started rigging the Artist's hands. So far I've set up controls for the hands and all the fingers. I've also created a control that spreads the fingers outwards. So far everything is going smoothly.


Minor - Skinned Artist's Arm Model

I've finished skinning the arm. I've mirrored the weights over to the other arm and everything is working okay. I'm debating whether or not to add corrective blend shapes to the elbow. The reason being is that I'm not sure if there is much point spending time on this when the elbows aren't even going to be in shot in my film. However, I will be presenting the models in a turnaround for my minor submission, where you will be able to see the whole arm. I'm not going to add them right now but I might add them if I have time. I still need to skin the many versions of Sketch so I definitely think I should prioritize that.

Top View of Blended Joint Weights on the Hand

Underside View of Blended Joint Weights on the Hand

Blended Joint Weights on Wrist and Forearm

Blended Joint Weights on Elbow


Wednesday 1 January 2020

Minor - Beginning to Blend the Weights

I've started to blend the joint weights on the Artist's hand. I've been running into a few Maya problems like Maya freezing every time I try to smooth the mesh. I'm not sure why this is happening but I've cleaned up my project files in case that's the reason why it keeps freezing? Besides that, I'm happy with the movement of the fingers so far, but I've still got a fair way to go.