I have finished binding and weight grouping the Mesh on my Artist's arms models. I'm a bit worried about how much the wrist and the forearm twist when I rotate them. If I keep rotating the wrist, it twists too much and looks like the wrist is broken. Hopefully, once I blend the weights out this won't be an issue.

Monday, 30 December 2019
Tuesday, 10 December 2019
Minor - Artist's Arms Skeleton
I've created a skeleton for the Artist's arms. I've also added script to the forearm joints so that when I rotate the wrist, the forearm rotates naturally with it.
 |
| Side View of Arm Skeleton |
 |
| Top View of Arm Skeleton |
 |
| Top View of Hand/Finger Joints |
 |
| Forearm Joint Script |
Minor - Artist's Hand UVs
I've created the UVs for the arm model and I'm pretty happy with how they're looking. There's a little bit of warping in between the fingers, but I don't think it's that noticeable. If they become a problem then I'll have to fix them, but I think that they look okay at the moment.
 |
| UV Map & Top View of Hand |
 |
| The Underside of the Arm & Hand |
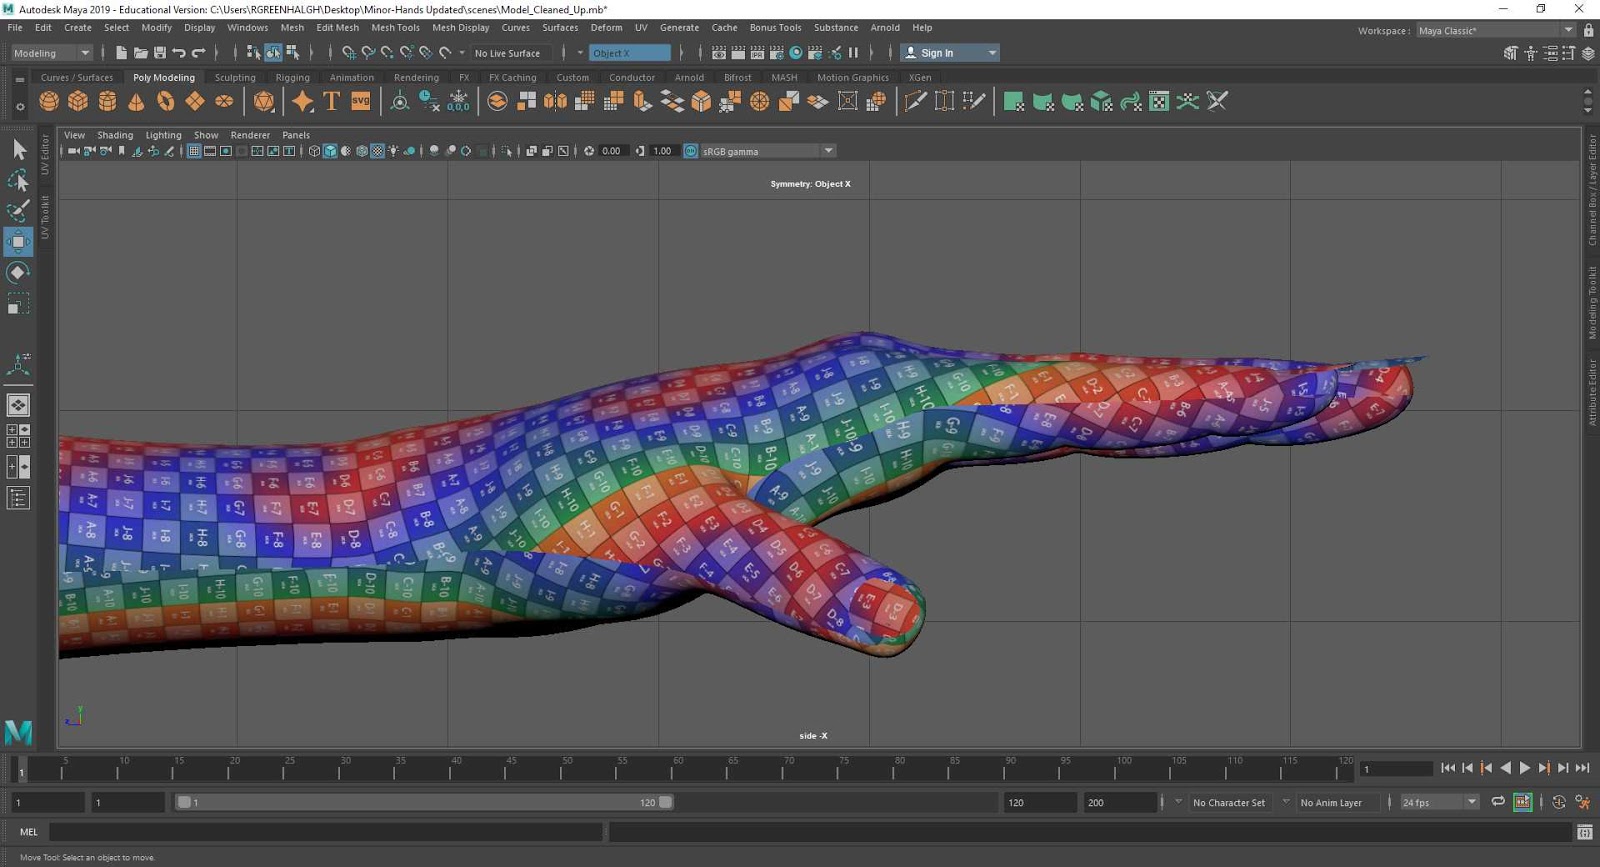 |
| Side View of Hand |
Thursday, 5 December 2019
Minor - Masculine Sketch Model Progress
Today I blocked out my Masculine Sketch model. I had to redo the model a couple times as I tried to just use the original model of Sketch as a base, but I realised it would be more time efficient to start from scratch. I'd like to add more definition, although this isn't insanely important as the most important part of the model is it's silhouette/outline.
 |
| Masculine Sketch Front View |
 |
| Masculine Sketch Front View |
 |
| Masculine Sketch Side View |
 |
| Previous Model |
Friday, 29 November 2019
Minor - Fixing Hand Geometry
Today I fixed some of the geometry in my hand model that was lumpy, especially in the pads on the palm of the hand. I also tried to move around the geometry so that the faces are more even on the side of the hand, although I 'm sure if I've gone about this the right way. I spent a lot of time trying to figure out where to cut new edges ad delete old ones, and there was a lot of trial and error to get to where I am now. I would still like to add some definition to the palm of the hand, but 'm finding that difficult to do without it looking lumpy.
 |
| Side View of Full arm |
 |
| Palm of the Hand |
 |
| Side View of Hand |
 |
| Top View of Hand |
 |
| Perp View of Hand |
Sunday, 24 November 2019
@Alan - Minor - Alternative Versions Model Progress No.1
I've started to model the feminine and squiggly versions of Sketch. I'm a little worried about the topology right now as I'm not sure where I should add extra edge loops for the joints. I'm also worried about the spacing of the geometry on the feminine Sketch model, especially around the leg/hip area.
 |
| Squiggly Sketch Front View Un-smoothed |
 |
| Squiggly Sketch Front View Smoothed |
 |
| Feminine Sketch Front View Un-smoothed |
 |
| Feminine Sketch Front View Smoothed |
 |
| Feminine Sketch Side View Un-smoothed |
 |
| Feminine Sketch Side View Smoothed |
 |
| Feminine Sketch Back View Un-smoothed |
 |
| Feminine Sketch Back View Smoothed |
Minor - Revised Turnarounds
I've altered my turnarounds a little as both the masculine and feminine Sketch turnarounds. The side profiles were leaning a little, making it look like they were about to topple over. I've also just altered the legs on the feminine sketch turnarounds so they're more even. I'm still not really sure how to draw the feet for the side profile of my masc Sketch turnarounds, but I think I'm just gonna go ahead with modelling, and if it's an issue i'll sort it out when I get there.
 |
| Revised Fem Sketch Turnarounds |
 |
| Revised Masc Sketch Turnarounds |
Friday, 22 November 2019
Minor - Toon Shader Experiment No.1
I've been experimenting with the Arnold toon shader a little bit. I was having a bit of trouble as I was trying to use Maya's toon shader instead of Arnold's toon shader. This meant that the outline was only covering the low res version of my model, and wouldn't smooth out to match my smoothed model. I changed the colour of the black toon outline by changing the edge colour of the outline to an image file of a pencil texture. I really like how this looks as it doesn't look as harsh as the bold black line. I would like to experiment more with changing the actual shape of the outline so that it represents a more uneven pencil stroke, instead of being a clean, precise line. I'll have to find the right tutorial for this mixed with lots of experimenting.
 |
| Toon Shader Experiment No.1 Test Render |
 |
| Pencil Texture |
 |
| Workspace/Edge Colour Attributes |
Minor - Sketch Turnarounds
Today I drew turnarounds for each different version of Sketch that will appear in my animation. I've modeled the normal looking Sketch already, but I still need to model a feminine, masculine, and squiggly Sketch. I've included the turnarounds I drew of regular Sketch awhile back, just so you can see what they all look like together.
 |
| Regular Sketch Turnarounds |
 |
| Feminine Sketch Turnarounds |
 |
| Squiggly Sketch Turnarounds |
 |
| Masculine Sketch Turnaround |
Thursday, 21 November 2019
Monday, 18 November 2019
Minor - Artist's Hand Model Progression
I've made some progress with my hand/arm model for the artist character in my animation. I'm pretty happy with how it's looking right now! The hand doesn't look super detailed, but I didn't want to create a super realistic look so I'll be adding quite a lot of the detail in the texturing.
I've just got to do a bit of clean up and get the green light to continue and then I'll start uv-ing the model.
I've just got to do a bit of clean up and get the green light to continue and then I'll start uv-ing the model.
 |
| Perspective View |
 |
| Top View |
 |
| Top View Full Arm |
 |
| Side View Full Arm |
Monday, 21 October 2019
Minor - 2D Animation Test
After discussing with Alan that I was worried about not getting the hand drawn look in my animation using toon shaders, I thought it would be good to try a few things out to see what looks/ works best. I’m actually really happy with how it looks! It definitely has a more hand drawn quality to it that I can’t seem to translate onto my 3D model right now. I will continue to research into toon shaders, as well as trying to find any plug ins that will help me translate the character into 3D. If I’m still not happy with the results of that, I’ll focus more on 2D animation for my main character, but that’s more of a plan B right now. This test was extremely useful to me as I will be incorporating 2D into my animation anyway for illustrated effects.

Sunday, 20 October 2019
Rigging Techniques - Object Exchange
In this tutorial I learned how to animate an object being passed from one hand to another using locators and constraints. This was a really useful tutorial for me to do as I'll need this a lot in my final project.

Friday, 18 October 2019


Thursday, 17 October 2019

Monday, 7 October 2019
Life Drawing Session
Today in life drawing we focused on the main principles of traditional drawing. we warmed up by drawing whatever we could of the structure in front of us, and then after 2 minutes, move on to the canvas to the right of us. This resulted in a collaborative piece that lots of people from the class had worked on.
 |
| Collaborative Piece |
 |
| 15 Minutes Focusing on Line |
 |
| 10 Minutes Focusing on Negative Space |
 |
| 10 Minute Focusing on Shadow and Form |
 |
| 15 Minutes Focusing on Depth |
Saturday, 5 October 2019
Rigging Techniques - Conditional Squash & Stretch
For this tutorial, we learned how to use squash and stretch techniques, like we did with the mushroom tutorial, but we also learned how to make this conditional. This means that when you stretch the leg and arm outwards, the mesh will stretch, but when you move the arm and leg inwards, the mesh bends at the joints and doesn't squash/stretch.

Friday, 4 October 2019
Rigging Techniques - Basic Squash, Stretch and Volume Preservation
Today we learned the basics of squash and stretch and how to apply that to a character rig. We were given a model of a mushroom to experiment with.
 |
| Normal Sized Mushroom |
 |
| Stretched Mushroom |
 |
| Squashed Mushroom |
Subscribe to:
Posts (Atom)